Sunday, August 30, 2015

Thank You Card - 2

A couple weeks ago I posted a very special Thank You card and here is another one.  I absolutely LOVE the beautiful and inspirational image sets that Mynn Kitchen has at


I saw a card that looked similar to this and I wish I could remember where I saw it or who did it, but I can't.  I lost the page before I could even read how it was done.  So I used a flower from the "Blossoming" digital stamp set from MHK Designs and the scripture from the "Look to the Light" stamp set from CTMH.  I used Distress Markers to color the center of the flower and to create the "splash" look (as I like to call it).  I had only seen that effect so I had to use my imagination as to how it was done.  I started out next to the flower making dots with the tip of the Distress Marker.....at first so close together it's hard to tell they are dots, and the farther out I went the farther apart the dots got.  I fell in love with that technique the moment I saw it.  And if I'm not doing it the same way, it's okay....I still love it.

For more inspiration visit Mynn's blog On A Stampage  

Here are some challenges that might interest you...

Crafty Card Makers and More #146 No Patterned Papers
Get Creative Challenges #22 No Printed Paper
Try It On Tuesday Sending You Flowers
Addicted To Stamps Challenge Blog #159 Clean And Simple
Crafty Girls Creations Challenge #3
Scrapping Everyday Miracles Challenge Sketch/Scripture
Hiding In My Craft Room #214 Freestyle
with a twist - make your own background
Our Daily Bread Designs Blog #252 Anything Goes w/ scripture
CAS On Sunday Challenge #66 Splash

Thank you for stopping by and....
HAPPY CRAFTING!!!

Saturday, August 29, 2015

Sunsationl Stamps August Release Party

Before I share my Back To School project I want to make sure you don't miss out on the Sunsational Stamps August New Stamp Release Party which is TODAY  HERE on Facebook starting 2:00 EDT.  There will be FUN and GAMES and PRIZES and NEW IMAGES being released...don't miss out!!!

I wanted to make something that didn't need to be colored....this is for all of you that don't have all the coloring supplies or time but still want to make something awesome!  All of the images I used are pre-colored.


I love decorating frames so I made frames for my grandkids first day of school pictures.  The first one I made is for Amiee.  I got the frame at Michael's.  You can leave the frame plain or paint it.  I put Mod Podge on it because it gives it a smoother surface which makes dusting easier.  I used chalkboard vinyl to cover the front of the frame....thought it was perfect for the "back to school" look.  I decorated it with several images from Scrapping With Lisa Designs a division of Sunsational Stamps .   I added some accents to the images with Distress markers and Distress inks but you don't have to.  I added Amiee's name to the yellow crayon.  I used a Chalk Marker from CTMH to write on the chalkboard vinyl, but regular chalk would have worked as well.  And I had to add a few flowers to girly it up :)

I hope this project inspires you to make something of your own.  And if you would like more inpiration you can visit....


Thank you stopping by and....
HAPPY CRAFTING!!!

Friday, August 28, 2015

Sunsational Stamps - Back to School - Week 4

It's back to school time and that means backpacks and jackets....and they both have zippers.  Zipper-pulls are always a fun way to personalize things and are easy to make.

I made these using Bake 'n Shrink for inkjet printers.  I like these best because not only do they work with inkjet printers, but you can use a variety of things to color on them.  I have used Distress Markers, Spectrum Noir, glitter gel pens, Sakura Jelly Roll pens, and colored pencils.  Other shrinky brands only work with laser printers and permanent inks.  You can find Bake 'n Shrink at http://www.printonit.com/default.asp 


I used some fun back to school images from Scrapping With Lisa Designs a division of Sunsational Stamps .  These are pre-colored which are awesome if you don't have what you need to color them, or just don't have the time.  I printed them on the Bake 'n Shrink sheet using my inkjet printer.  The image needs to be about 3 or 4 times the size you want the final product to be (as shown in the pictures).  Allow room around the image if you are going to cut it out using a die.  I used a round Sizzix die to cut these out.  You can always cut around the image with scissors if you like....as you can see I did with the rabbit and the cow (a little farther down the page).  Also...this is important..... whatever you use to color your image with will get DARKER when it shrinks....so you don't need to make it dark before shrinking.  On the back to school images that I printed out, I should have printed with a lower quailty so they wouldn't have been so dark.  Another IMPORTANT bit of information.....if you are going to punch a hole in the top for a zipper-pull or necklace do it BEFORE you shrink it and remember the hole will shrink as well.  All of the directions are on the package, including oven directions.  To make your finished product last longer....protecting them from dirt and UV rays...you should spray them with Krylon UV-Resistant Clear Acrylic Coating, or Krylong Fusion.  You can use a jumprign and split keyring, or chain, or whatever you have on hand to attach them to zippers.

Below are two other things I made with Sunsational Stamps and Bake 'n Shrink.  With these I stamped the images with Stazon ink and colored them with Distress markers.  Then I cut them out and baked them.  When they had cooled I topped them with Diamond Glaze for a thick, glossy top.  I turned the bunny into a necklace by adding a ruby heart gem , along with a red jumpring and red chain.  The cow will make a cute embellishment on something, but I haven't decided yet...I just LOVE cows :)


To see more images please visit....
and

And for more ideas and inspiration visit....
and

Thank you for stopping by and....
Happy Crafting!!!

Thursday, August 27, 2015

If Friends Were Flowers

I have a special new friend and I wanted to make her a card that would let her know she is special to me.  Thankfully I had the perfect digi stamp set to make this card.  It is called "Blossoming" by MHK Designs 


This card is pretty simple but beautiful.  The leaves were colored with Distress markers, and the flower was colored wtih Twinkling H2O watercoloers.  I stayed with a green theme including the gems.  And I love the sentiment "If friends were flowers I'd pick you"

I found some challenges that I think this card is perfect for...

A Gem Of A Challenge #151 "One For The Girls"
Dragonfly Journeys #20 "Girlfriends"
Great Impressions August Challenge "Add A Sentiment"
Crafty Cardmakers & More #146 "No Patterned Paper"
Get Creative Challenges #22 "No Printed Paper"
Try It On Tuesday "Sending You Flowers"
Crafty Girls Creations Challenge #3 "Anything Goes"

Thanks for stopping by and....
HAPPY CRAFTING!


Sunday, August 23, 2015

CASE-ing Christmas

I discovered a challenge blog called CASE-ing Christmas 
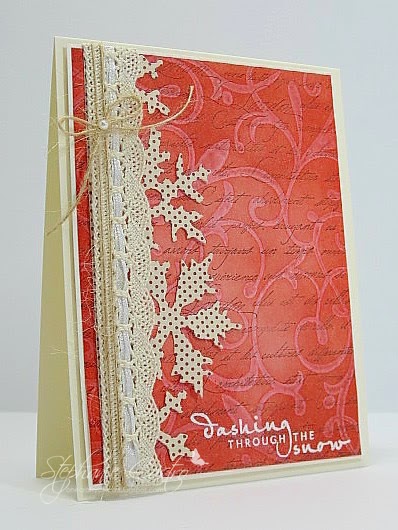
and thought I would give it a try.  Here is the provided picture of an inspiration card designed by Steph...


And here is the card I was inspired to make...


I hate to admit this, but that isn't my best work.  I didn't have a lot to work with because most of my Christmas supplies are still packed away.  I guess it's time I get my Christmas stuff unpacked...lol  But the look I was going for was old-fashioned. 

Be sure to check out CASE-ing Christmas and all the beautiful creations the design team made.

Thanks for stopping by and....
HAPPY CRAFTING!!!

Friday, August 21, 2015

Thank You Card - 1

There are times when you need to say THANK YOU....
and you need a special card to say it.

I am making Thank You cards for the wonderful people that made my baptism so very special.  This is the first one.


I also want to thank Mynn Kitchen at MHK Designs 
for having this beautiful and spiritual digi stamp set.

For more inspiration visit her blog On A Stampage 

And here are some fun challenges I'm entering this card in...

Suzy Bee's Bloomin' Challenge Blog Challenge #93
Anything Goes with a twist - Monochrome
Dragonfly Journeys Challenge #19 Purple Rain
Our Daily Bread Designs Blog Challenge #251
Crafty Gals Corner Challenge #33 - Anything Goes
Mod Squad Challenge Blog Lavender & Lace Challenge
A Gem Of A Challenge #151 One For the Girls
Scrapper's Delights Challenge Blog #47
Chocolate, Coffee & Cards Challenges #98
Use a Sentiment

Thank you for stopping by and...
HAPPY CRAFTING!!!

Sunsational Stamps - Back to School - Week 3

Back to school means study time, especially for those in Jr. High and High School.  And who wouldn't want a sign to hang on their door letting everyone know... 
DO NOT DISTURB ...while they are studying?  
This is the perfect gift, or project, for any student.


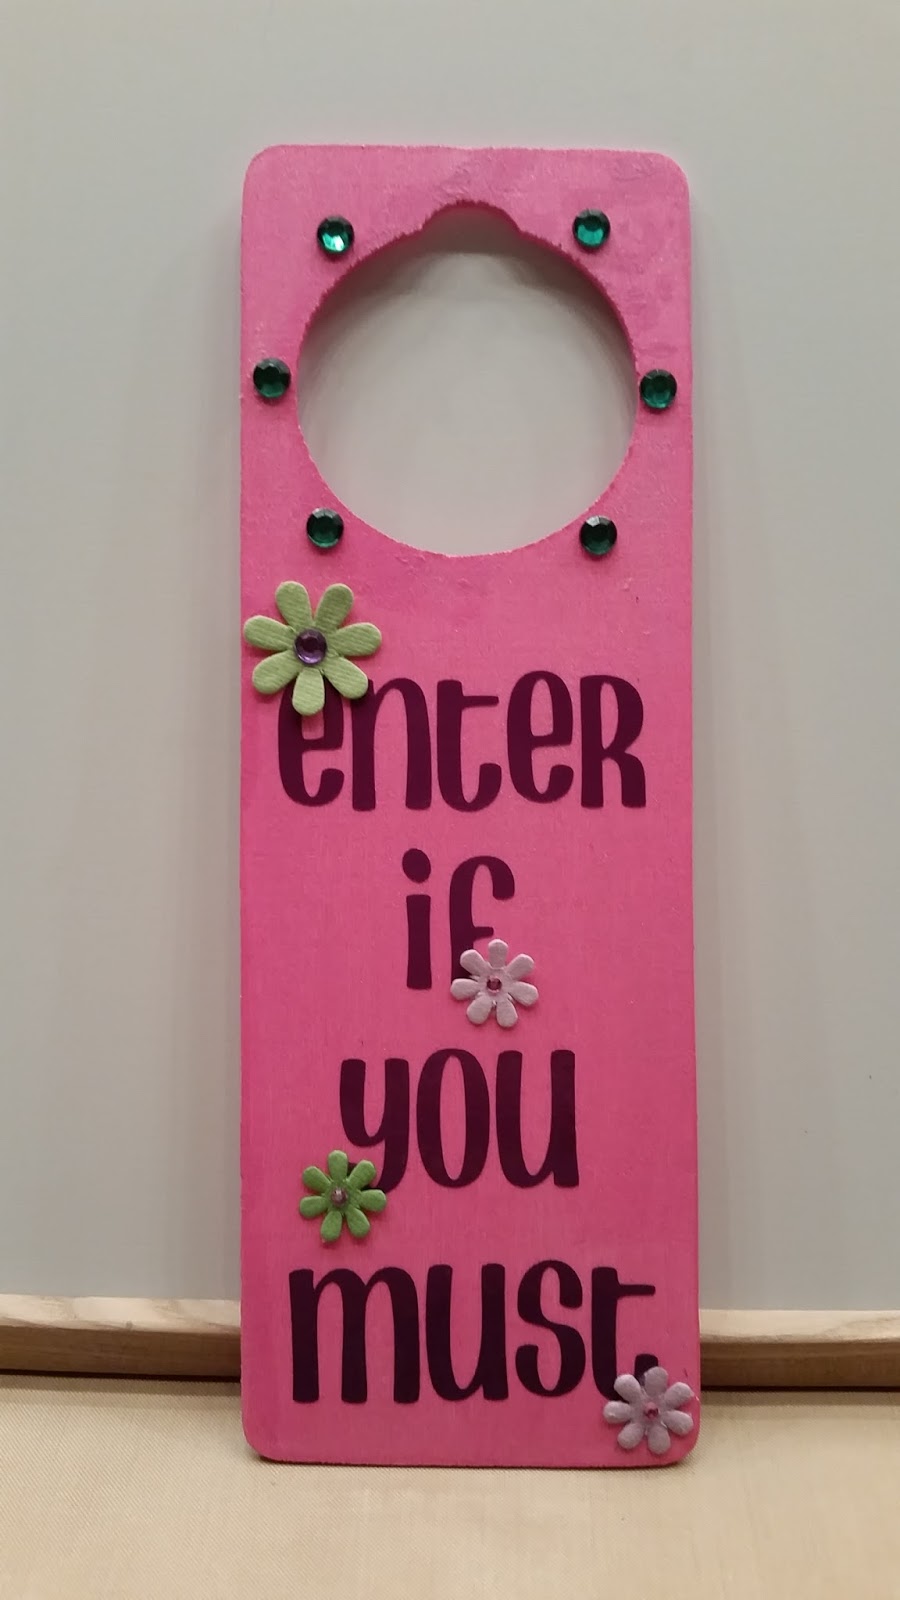
I bought the wooden door hanger at Wal-Mart...they come in a package of 6 for a reasonable price.  I painted it with acrylic paint and then decorated it.  The image set is Hitting The Books at Sunsational Stamps.  I colored the image with Distress markers.  The chalkboard was made with chalkboard vinyl and written on with a chalk marker from CTMH.  I added some number and letter tiles, and some gems.  The words on the other side were cut out of vinyl with my Cricut, and some flowers and gems were added.  This project is fun and easy.....something you and your child can do together, or your teenager can do themselves.

To see more images please visit....
and

And for more ideas and inspiration visit....
and

Thank you for stopping by and....
Happy Crafting!!!