Saturday, September 17, 2022

5 Step Stepper Card Tutorial, Directions, & Diagram


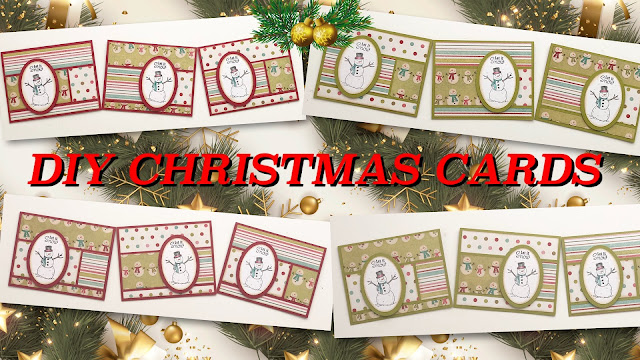
Don't let the Christmas cards fool you....this card fold is perfect for EVERY OCCASION!!!

You can make theses masculine, feminine, kids, weddings, anniversaries, birthdays.....whatever you need.


CLICK HERE to watch my video tutorial


Here is the diagram you can use as a visual aide.

RIGHT CLICK on the image and then choose SAVE AS to save the image to your computer, or COPY.  OR LEFT CLICK and then RIGHT CLICK and choose SAVE AS or COPY.


Solid lines are CUT lines


Dotted lines are SCORE lines


5 Step Stepper Card

 5 ½” x 8 ½” cardstock (A2 size card)

Cutting Directions


Use a PAPER TRIMMER not a guillotine or rotary cutter

Lay in paper trimmer horizontally/landscape

Place cardstock at 1” mark

Place blade at 2 ½” and cut from 2 ½” to 5 7/8”

Slide cardstock down to the 2” mark

Place blade at 3 3/8” and cut from 3 3/8” to 6 ¾”

Slide cardstock to the 3 ½” mark

Place blade at 3 3/8” and cut from 3 3/8” to 6 ¾”

Slide cardstock to the 4 ½” mark

Place blade at 2 ½” and cut from 2 ½” to 5 7/8”


*If you use your paper trimmer to score, then turn the cardstock ¼ turn to your left, and follow the scoring directions below*


*If you use a scoring board, leave your cardstock in the same position it was while you were cutting, place on your scoring board, and follow the scoring directions below*


 Scoring Directions

If using a scoring board, using a ruler for a guide will help keep your scoring tool lined up.

At 2 ½” score from the top edge to the first cut line, and from the last cut line to the bottom edge

At 3 3/8” score between the first and second cut lines, and between the third and fourth cut lines

At 4 ¼” score between the second and third cut lines

At 5 1/8” score from the top edge to the first cut line, and from the last cut line to the bottom edge

At 5 7/8” score between the first and second cut lines, and the third and fourth cut lines

At 6 3/4" score from the top edge to the second cut line, and the third cut line to the bottom edge


Starting with the score lines at 2 ½”, fold all of the FIRST score lines MOUNTAIN folds.  Fold the next score lines VALLEY folds.  And the last score lines (which will be the front of the card) MOUNTAIN folds.


Layers

1 Horizontal panel:  1-¾” x 5-½” / Layer 1:  1-5/8” x 5-3/8” / Layer 2:  1-½” x 5-¼”

4 Vertical panels: 1” x 2-1/2” / Layer 1:  7/8” x 2-3/8” / Layer 2:  ¾” x 2-1/4”

1 Center vertical panel:  1-1/2” x 2-1/2” / Layer 1:  1-3/8” x 2-3/8” /

Layer 2:  1-1/4” x 2-1/4”


You can always make the layers the size of your choice.  You can also just do one layer if you want, or three layers.  It just depends on the look  you are going for.


Thanks for stopping by and....

HAPPY CRAFTING!!!


Saturday, September 10, 2022

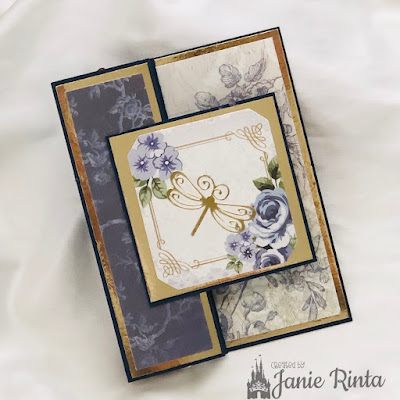
W-V Fancy Fold Card

Hi Everyone!

Today on my YouTube channel, Janie - The Craft Princess, I have a video tutorial on how to make a W-V Fancy Fold Card.  If you have never heard of that card be sure to check it out.  You can find the video by clicking HERE

Here are a couple pictures to entice you 😊


I discovered this card in a Kat Scrappiness video that Tasha (Crafty Pink Pixie on YouTube) made.  Below you will find a link to her blog post that has a link to her video as well as the measurements she used for her card.

As promised in my video, here are the measurements I used.


Measurements


Base: 5 1/4" x 11"
Score: 1 3/4", 3 1/2", 5 1/4" and 7"

I show how to fold it in my video 


Small Base: 3" x 6"
Score: 3" and fold


 Panels

Back Panel Layer 1(Solid Paper): 3 7/8" x 5 1/8"

Back Panel Layer 2 (Patterned or Solid Paper) 3  5/8" x 4  7/8"


4 Panels Layer 1 (Solid Or Glitter Paper): 1 5/8" x 5 1/8"

 4 Panels Layer 2 (Patterned Paper): 1 3/8" x 4 7/8""


3" x 3" Card (3" x 6")

Front Square:
Layer 1 (Solid): 2 7/8" x 2 7/8"
Layer 2 (Solid/Patterned/Image): 2 5/8" x 2 5/8"
Back Square:
Layer 1 (Solid): 2 7/8" x 2 7/8"
Layer 2 (Solid for sentiment): 2 5/8" x 2 5/8"


Optional Square For Back Panel 

Layer 1 (Solid) 2  3/4" x 2  3/4"

Layer 2 (Solid for sentiment OR Image) 2  1/2" x 2  1/2"


Watch my video for details on putting it all together.


For Tasha's version of this card you can find her measurements and link to her video on her blog...Click HERE


Thanks for stopping by and....

HAPPY CRAFTING!!!


Sunday, September 4, 2022

DIY SHAKER POCKET - You Don't Want To Miss This!!!

 The DIY SHAKER POCKET has revolutionized the shaker card world!!! This may be different than what you're imagining so be sure to watch by clicking HERE. Besides, you'll want to see how I made this beautiful card 😊


Let me tell you a little about this shaker card...

I did not use foam tape
I did not have sequins scattered everywhere
I did not have to make sure the sequins were in the right place

I could easily judge if I had enough sequins

I could go on and on, but you will just have to see for yourself 😊


I'm still on my "use what you have" kick.

The Prima Marketing flowers I have had for years and hadn't even opened the jar they came in.

The gold glitter paper that I die cut the Paris scene from is from Close To My Heart and they still sell it even though I have had mine for a couple years. Here is a link if you want to check out CTMH glitter paper....click HERE I also used that for the piece for the sentiment.

The gold glitter bling in the center of the flowers are from Close To My Heart and I have no idea how long I have had those, but they were the perfect addition to the center of those flowers to bring all the gold sparkle together. CTMH doesn't have the exact ones anymore but here is a link to their Gold Glitter Gems...click HERE

The sequins I have had for YEARS and 2 of the colors I had never even opened until I made this.

The Bonjour stamp is also from CTMH but they no longer have that one.

And that background.....well I made that in a video last year called Magical Embossing Powder Techniques - A Collaboration With Rise And Procraftinate and if you haven't seen it just click HERE So that had landed in my stash just waiting for the right project to use it on 😊

You never know what you'll find when you start looking through what you have 😊

Oh and that Paris skyline die is from Kokorosa Studio and it's called "Kokorosa Metal Cutting Dies With Paris Buildings" (ok that's a mouthful!!!) and you can find it by clicking HERE That is the only new thing I used.


Well I hope you check out that video because it will be worth watching just to see how the shaker pocket is made 😊


Thanks for stopping by and....

HAPPY CRAFTING!!!


Saturday, September 3, 2022

More Christmas Cards - August SheetLoad Of Cards

 I can't believe August flew right by and I forgot to post my August SheetLoad Of Cards I made using the sketch from Call Me (Crafty) Al

Here is a picture


I made 12 cards using her August SheetLoad Of Cards sketch and it was quick and easy.  ALSO I changed things up just a little.

You can watch my video by clicking HERE

I think you will love how easy it is to mass produce cards, whether it's Christmas cards or any occasion cards.  Here is the link to her Call Me (Crafty) Al video where you can see her version of the card, click HERE,  but be sure to watch mine to see my version 😊


I'm promoting "use what you have", so for these cards I used papers I have had for years, and a stamp that came with a craft magazine years ago.  Sometimes we forget what we already have.....so go look in your stash and find a few things you forgot you have or haven't used in years and pull it out.  Make it a priority to make something with it 😊


I have another video you aren't going to want to miss if you like shaker cards!  It went up on YouTube today, and if I remember I will post it here in the blog tomorrow 😊  I just wanted to share this Christmas one first.


Let me know if you like the mass produced Christmas cards I've been sharing.  You can always use them for inspiration for mass producing any kind of card.


Thanks for stopping by and....

HAPPY CRAFTING!!!