Saturday, November 12, 2022

Card Sketch - Perfect For Christmas Or Any Occasion!!!

 Card Sketch

Perfect for Christmas or any occasion!!!


I used this card sketch in my YouTube video today, and I wanted to share it with my blog followers and my YouTube subscribers and viewers as my way of saying THANK YOU!


This sketch is designed for 5" x 6.5" cards.

(links to products used, including cards & envelopes, are below)

To save or copy the image just RIGHT CLICK on the image and then choose SAVE AS to save the image to your computer, or COPY.  OR LEFT CLICK and then RIGHT CLICK and choose SAVE AS or COPY.  Either way works.


Here are some of the cards I made in my video


.To watch my video you can CLICK HERE


In my video I'll show you how I used double-sided paper to create this look, but you can also do it with single-sided papers.  Also this sketch is perfect for ANY occasion, not just Christmas.  I plan on using this again in the future for birthday cards and more.


Here is a list of products I used:

(these are links you can click on to get to the products)

5" x 6.5" Value Pack Cards & Envelopes by Recollections®

Peppermint Stripe Paper Pad by Recollections™, 6" x 6"

Gingerbread Christmas Stickers by Recollections™

Christmas Cottage Die Cut Stickers by Recollections™

8.5" x 11" Foil Cardstock Paper by Recollections™, 25 Sheets

Beacon 3-in-1 Advanced Craft Glue 8 oz

Distress Ink ***Some links may be affiliate links and even though I might benefit from you using them, it will not affect the price of the product for you. Thanks you for your support***


If you use this sketch I would LOVE to see your cards! Please stop by my Facebook group, Crafter's Castle, and share your creations 😊


Thanks for stopping by and....

HAPPY CRAFTING!!!


Saturday, November 5, 2022

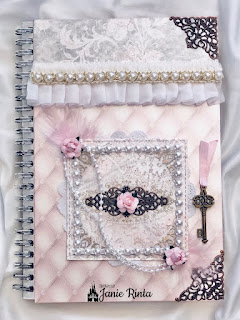
Shabby Chic Journal Transformation & Giveaway!!!

Today on my YouTube channel I'm a Guest Designer for Decor8your life...AND...having a GIVEAWAY!

In my video I'm sharing the....

Transformation Of A Plain Craft Spiral Notebook

to an Elegant Shabby Chic Journal


CLICK HERE TO WATCH ON YOUTUBE

Links To Products I Used And Discount Codes

Decor8yourlife
fur Elektra Shabby Chic Digital Paper Pastel Cardstock Fabric Paper Temptress Paper Temptress 20% off disount code: JANIE20 or janie20 (works both ways) Pearl Glimmer Cardstock White Pearl Linen Cardstock
GIVEAWAY DETAILS!!!
***This giveaway is in no way affiliated with YouTube***
***You must be 18 years of age or older to enter***
***This giveaway is sponsored by Decor8yourlife***
***Giveaway is open Novemeber 5, 2022 - November 13, 2022***
The prize is ONE DIGITAL COLLECTION from Decor8yourlife 💗
To be entered in this giveaway you must visit Decor8yourlife website and take a look around. Then watch my video and leave a comment there (or edit your comment) telling me the name of your favorite digital paper collection that you might like to get IF you are the winner 😊
This is a video based giveaway, so any comments left here on my blog will not be included. It's that simple! Of course I would love it if you are SUBSCRIBED and if you LIKE and SHARE my video.....but it is not required for this giveaway. I'm just thankful that you are watching my video, commenting, and visiting Decor8yourlife. I hope you also visit Paper Temptress 😊 ***The winner will be announced on my channel on or about Tuesday, November 15th, 2022***

Thanks for stopping by and....
HAPPY CRAFTING!!!


Sunday, October 16, 2022

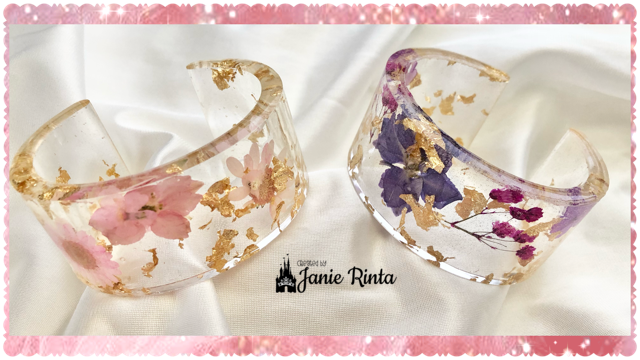
DIY Epoxy Resin Cuff Bracelets!!!


 New video on my channel today!

Just thought I would share some bracelets I made using ArtResin non-toxic epoxy resin. They are so pretty. One is mine and one I sent to my sister for her birthday 😊 

 This video is not a tutorial, but if you would like to see a tutorial please leave a comment letting me know.  However, in my video I do show the products used and tell a little about how I made these bracelets. CLICK HERE to watch.


I do have other videos on my channel where I show how to use ArtResin and make some jewelry.

The resin I use is ArtResin and is certified NON-TOXIC.....No VOCs, No BPA, No fumes, No need for special protective gear other than gloves (it's difficult to clean off your skin even though I have done it many times...LOL).

To learn more about ArtResin's safety you can CLICK HERE

Thanks for stopping by and....
HAPPY CRAFTING!!!


Saturday, September 17, 2022

5 Step Stepper Card Tutorial, Directions, & Diagram


Don't let the Christmas cards fool you....this card fold is perfect for EVERY OCCASION!!!

You can make theses masculine, feminine, kids, weddings, anniversaries, birthdays.....whatever you need.


CLICK HERE to watch my video tutorial


Here is the diagram you can use as a visual aide.

RIGHT CLICK on the image and then choose SAVE AS to save the image to your computer, or COPY.  OR LEFT CLICK and then RIGHT CLICK and choose SAVE AS or COPY.


Solid lines are CUT lines


Dotted lines are SCORE lines


5 Step Stepper Card

 5 ½” x 8 ½” cardstock (A2 size card)

Cutting Directions


Use a PAPER TRIMMER not a guillotine or rotary cutter

Lay in paper trimmer horizontally/landscape

Place cardstock at 1” mark

Place blade at 2 ½” and cut from 2 ½” to 5 7/8”

Slide cardstock down to the 2” mark

Place blade at 3 3/8” and cut from 3 3/8” to 6 ¾”

Slide cardstock to the 3 ½” mark

Place blade at 3 3/8” and cut from 3 3/8” to 6 ¾”

Slide cardstock to the 4 ½” mark

Place blade at 2 ½” and cut from 2 ½” to 5 7/8”


*If you use your paper trimmer to score, then turn the cardstock ¼ turn to your left, and follow the scoring directions below*


*If you use a scoring board, leave your cardstock in the same position it was while you were cutting, place on your scoring board, and follow the scoring directions below*


 Scoring Directions

If using a scoring board, using a ruler for a guide will help keep your scoring tool lined up.

At 2 ½” score from the top edge to the first cut line, and from the last cut line to the bottom edge

At 3 3/8” score between the first and second cut lines, and between the third and fourth cut lines

At 4 ¼” score between the second and third cut lines

At 5 1/8” score from the top edge to the first cut line, and from the last cut line to the bottom edge

At 5 7/8” score between the first and second cut lines, and the third and fourth cut lines

At 6 3/4" score from the top edge to the second cut line, and the third cut line to the bottom edge


Starting with the score lines at 2 ½”, fold all of the FIRST score lines MOUNTAIN folds.  Fold the next score lines VALLEY folds.  And the last score lines (which will be the front of the card) MOUNTAIN folds.


Layers

1 Horizontal panel:  1-¾” x 5-½” / Layer 1:  1-5/8” x 5-3/8” / Layer 2:  1-½” x 5-¼”

4 Vertical panels: 1” x 2-1/2” / Layer 1:  7/8” x 2-3/8” / Layer 2:  ¾” x 2-1/4”

1 Center vertical panel:  1-1/2” x 2-1/2” / Layer 1:  1-3/8” x 2-3/8” /

Layer 2:  1-1/4” x 2-1/4”


You can always make the layers the size of your choice.  You can also just do one layer if you want, or three layers.  It just depends on the look  you are going for.


Thanks for stopping by and....

HAPPY CRAFTING!!!


Saturday, September 10, 2022

W-V Fancy Fold Card

Hi Everyone!

Today on my YouTube channel, Janie - The Craft Princess, I have a video tutorial on how to make a W-V Fancy Fold Card.  If you have never heard of that card be sure to check it out.  You can find the video by clicking HERE

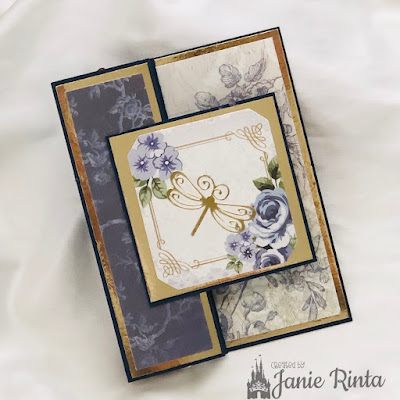
Here are a couple pictures to entice you 😊


I discovered this card in a Kat Scrappiness video that Tasha (Crafty Pink Pixie on YouTube) made.  Below you will find a link to her blog post that has a link to her video as well as the measurements she used for her card.

As promised in my video, here are the measurements I used.


Measurements


Base: 5 1/4" x 11"
Score: 1 3/4", 3 1/2", 5 1/4" and 7"

I show how to fold it in my video 


Small Base: 3" x 6"
Score: 3" and fold


 Panels

Back Panel Layer 1(Solid Paper): 3 7/8" x 5 1/8"

Back Panel Layer 2 (Patterned or Solid Paper) 3  5/8" x 4  7/8"


4 Panels Layer 1 (Solid Or Glitter Paper): 1 5/8" x 5 1/8"

 4 Panels Layer 2 (Patterned Paper): 1 3/8" x 4 7/8""


3" x 3" Card (3" x 6")

Front Square:
Layer 1 (Solid): 2 7/8" x 2 7/8"
Layer 2 (Solid/Patterned/Image): 2 5/8" x 2 5/8"
Back Square:
Layer 1 (Solid): 2 7/8" x 2 7/8"
Layer 2 (Solid for sentiment): 2 5/8" x 2 5/8"


Optional Square For Back Panel 

Layer 1 (Solid) 2  3/4" x 2  3/4"

Layer 2 (Solid for sentiment OR Image) 2  1/2" x 2  1/2"


Watch my video for details on putting it all together.


For Tasha's version of this card you can find her measurements and link to her video on her blog...Click HERE


Thanks for stopping by and....

HAPPY CRAFTING!!!


Sunday, September 4, 2022

DIY SHAKER POCKET - You Don't Want To Miss This!!!

 The DIY SHAKER POCKET has revolutionized the shaker card world!!! This may be different than what you're imagining so be sure to watch by clicking HERE. Besides, you'll want to see how I made this beautiful card 😊


Let me tell you a little about this shaker card...

I did not use foam tape
I did not have sequins scattered everywhere
I did not have to make sure the sequins were in the right place

I could easily judge if I had enough sequins

I could go on and on, but you will just have to see for yourself 😊


I'm still on my "use what you have" kick.

The Prima Marketing flowers I have had for years and hadn't even opened the jar they came in.

The gold glitter paper that I die cut the Paris scene from is from Close To My Heart and they still sell it even though I have had mine for a couple years. Here is a link if you want to check out CTMH glitter paper....click HERE I also used that for the piece for the sentiment.

The gold glitter bling in the center of the flowers are from Close To My Heart and I have no idea how long I have had those, but they were the perfect addition to the center of those flowers to bring all the gold sparkle together. CTMH doesn't have the exact ones anymore but here is a link to their Gold Glitter Gems...click HERE

The sequins I have had for YEARS and 2 of the colors I had never even opened until I made this.

The Bonjour stamp is also from CTMH but they no longer have that one.

And that background.....well I made that in a video last year called Magical Embossing Powder Techniques - A Collaboration With Rise And Procraftinate and if you haven't seen it just click HERE So that had landed in my stash just waiting for the right project to use it on 😊

You never know what you'll find when you start looking through what you have 😊

Oh and that Paris skyline die is from Kokorosa Studio and it's called "Kokorosa Metal Cutting Dies With Paris Buildings" (ok that's a mouthful!!!) and you can find it by clicking HERE That is the only new thing I used.


Well I hope you check out that video because it will be worth watching just to see how the shaker pocket is made 😊


Thanks for stopping by and....

HAPPY CRAFTING!!!


Saturday, September 3, 2022

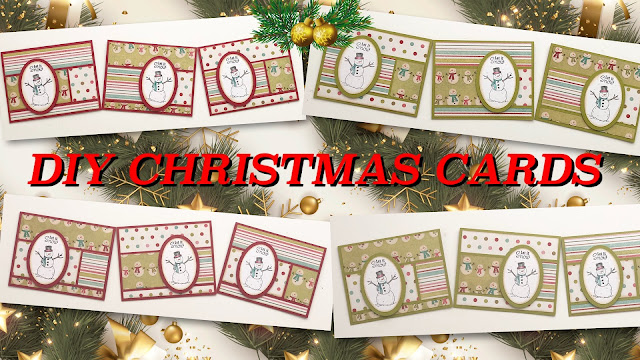
More Christmas Cards - August SheetLoad Of Cards

 I can't believe August flew right by and I forgot to post my August SheetLoad Of Cards I made using the sketch from Call Me (Crafty) Al

Here is a picture


I made 12 cards using her August SheetLoad Of Cards sketch and it was quick and easy.  ALSO I changed things up just a little.

You can watch my video by clicking HERE

I think you will love how easy it is to mass produce cards, whether it's Christmas cards or any occasion cards.  Here is the link to her Call Me (Crafty) Al video where you can see her version of the card, click HERE,  but be sure to watch mine to see my version 😊


I'm promoting "use what you have", so for these cards I used papers I have had for years, and a stamp that came with a craft magazine years ago.  Sometimes we forget what we already have.....so go look in your stash and find a few things you forgot you have or haven't used in years and pull it out.  Make it a priority to make something with it 😊


I have another video you aren't going to want to miss if you like shaker cards!  It went up on YouTube today, and if I remember I will post it here in the blog tomorrow 😊  I just wanted to share this Christmas one first.


Let me know if you like the mass produced Christmas cards I've been sharing.  You can always use them for inspiration for mass producing any kind of card.


Thanks for stopping by and....

HAPPY CRAFTING!!!


Saturday, August 6, 2022

Christmas Cards & Presents

 First things first......

Christmas Presents!!!

Ok....not presents exactly....more like PRIZES!

Yes, if you missed my video on Friday, I have announced the winners of BOTH of my

Christmas In July Giveaways!!!

Congratulations to

Peach!!!

You are the winner of my first giveaway on July 16

AND

Congratulations to

Fit Kitty!!!

You are the winner of my second giveaway on July 23

You have each won a $10 gift code to InLoveArts

CLICK HERE to visit their store
And use the code JANIE to save 25% on your order!

To claim your prize you need to leave a comment on the video that announces the winners, and I'll give you my email address in reply to your comment so you can contact me to claim your prize.

CLICK HERE to watch that video!

CONGRATULATIONS LADIES!!!

And THANK YOU to everyone that watched my videos and entered my giveaways!


Now for the Christmas Cards!

I just put up a video on YouTube sharing 12 Christmas cards to give you a little inspiration.  It's not exactly a tutorial, just enough to get you started.  I show what I used, and how I cut and diecut the papers, but I don't take you through assembling them.  Then I show you all 12 finished cards.


To pique your interest, I'm going to post a picture here.  BUT....in the video you will get to see them individually and up close, as well as learning a little bit about how I made them.

CLICK HERE to watch the video

These are made with Prima Marketing Christmas Sparkle products and are not your traditional Christmas colors.  I am so happy with how this turned out!

If you don't want to watch the video but want to know what I used, here are the products and affiliate links for you.

Prima - Christmas Sparkle Collection - 6 x 6 Paper Pad https://shrsl.com/3n4ot Prima - Christmas Sparkle Collection - Chipboard Stickers https://shrsl.com/3n4p1 Prima - Christmas Sparkle Collection - Flower Embellishments https://shrsl.com/3n4ov Ranger Ink - Stickles Glitter Glue - Essentials Bundle https://shrsl.com/3n4p3 Beacon 3-in-1 Advanced Craft Glue 8 oz https://amzn.to/3bpx4QV ***Some links may be affiliate links and even though I might benefit from you using them, it will not affect the price of the product for you***

Let me know what you think of the cards once you watch the video....I really love hearing from you and love to know your thoughts.

Thanks for stopping by and....
HAPPY CRAFTING!!!


Saturday, July 23, 2022

Looking For A Giveaway?

 Looking For A Giveaway?

If you are coming here from my YouTube video that has a secret giveaway mentioned in it, thanks for stopping by!  The rules and details are below....just keep scrolling 😊

If you stumbled across this blog post and want to enter my giveaway, you need to visit my YouTube channel (CLICK HERE) and find my video that has the secret giveaway.....and not any secret giveaway....the one where I tell you to visit my blog for the rules and details 😊


Giveaway Rules & Details

(open Woldwide)

Prize is a $10 Gift Code to spend at InLoveArts

You MUST be at least 18 years old

You MUST watch and comment on the giveaway video.  You may find more than one giveaway video but only ONE secret giveaway video says to come to this blog for details. 

***If you mention this giveaway in the VIDEO COMMENTS I will DELETE it***

*If your name for YouTube comments is different than your name for blog comments, please let me know both names*

You MUST visit InLoveArts Shop (CLICK HERE) And if you decided to shop there you can use the discount code JANIE for 25% off your order.

You Must leave a comment here on my blog that INCLUDES the the LINK or FULL NAME of at least one product from InLoveArts that you would like get from their NEW ARRIVAL category.

IMPORTANT: This giveaway is open from July 23-31, 2022 and the winner will be announced here on my blog and also in a video around August 6, 2022

*This giveaway is in no way associated with YouTube or any of it's subsidiaries*

*This giveaway is in no way associated with Blogger / Blogspot or any of it's susidiaries*

*This giveaway is sponsored soley by InLoveArts*

IF YOU'RE WONDERING.....

The reason I have SECRET giveaways is to reward my viewers that actually watch the ENITRE video. If you mention the giveaway in your comments on the video, then you are defeating the purpose. Please be descrete if you want me to continue having secret giveaways once in awhile. Thank you 😊


Good Luck Everyone And....

Happy Crafting!!!


Saturday, July 16, 2022

Christmas In July & More

 Christmas in July & More!!!

I love Christmas in July....I love Christmas all year 'round! And to celebrate, I have made a fun video featuring a Gnome die set from InLoveArts.  It's a quickie, but I hope it will give you some ideas and maybe inspire you to make some Christmas cards this month so when Christmas comes around you'll be prepared!


Here is what you will see in Saturday's video 

(CLICK HERE if you would like to watch)


Yes, that last one isn't a Christmas card, and that is because I'm showing that the die set, "Gnome in Star Hat Holding Flower Cutting Dies" from InLoveArts, isn't a Christmas die set. I share in my video how you can use that die set for Christmas too. You know me, I like stamps and dies I can use more than one way 😊 For the Christmas card I also used the "Ice Series Background Paper" from InLoveArts, and "Pearl Glimmer Cardstock" from Paper Temptress. And to show my appreciation, you'll find discount codes in my video description box 😊


Sunday's video is not Christmas themed....sorry.

(CLICK HERE if you would like to watch)

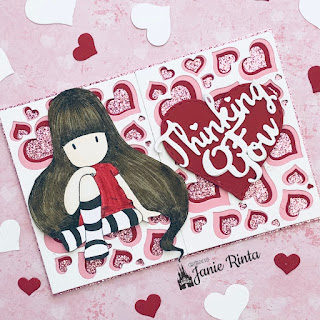
As you can see, it looks more like Valentine's Day...LOL

It's all about hearts and different ways to use the "3 Pcs Combined Heart Background Dies Set " from InLoveArts


After watching my video I'm sure you will come up with a few ways of your own to use this 3 piece heart background die set. And I also used the "
Warm Heart Words Cutting Dies" from InLoveArts.

You can find the links and discount codes in my video description box. I do hope you stop by and watch. Both videos are short.....only about 5 minutes each 😊

I hope you enjoy this cardmaking inspiration!


Thanks for stopping by and...

HAPPY CRAFTING!!!


Sunday, June 26, 2022

Making Jewelry Is A Craft Too!!!

 Welcome to Crafter's Castle!


Crafting means different things to different people.  It could be cardmaking, papercrafting, upcycling, home decor, knitting, painting, candlemaking, making jewelry....and so much more.  Some of us only do one craft, and others, like me, do many different crafts.  That is what Crafter's Castle is all about....a place to learn about a variety of crafts and get inspiration.  It's a place where you might get introduced to a craft you haven't tried yet or may not have even known about.  Whatever your craft interests are, I hope you get inspired here.


So with that said, today's post is about making jewelry.  Nothing complicated....in fact you can even get kits to get you started.


Yesterday I posted a video on making ocean theme necklaces (or the same supplies can also make earrings) using a few supplies from PandaHall Selected.   It can be as simple as adding a pinch bail and chain to an open back bezel pendant......or step it up by adding a charm to that....or taking it even a step farther by adding non-toxic ArtResin.  It just depends on what you have and what you're comfortable with.

Watch that video by clicking HERE


The previous week I made moon & star earrings using a kit from PandaHall Selected.  It comes with everything you need to make these earrings.....EXCEPT....you will still need pliers (which most of us have around the house).  It's so easy and even comes with a sheet of examples to get you started and a few instructions.

Watch that video by clicking HERE


And if scroll back on my YouTube channel to April 30 and May,  7 you'll find 2 more videos on making jewelry.  


Making jewelry for yourself or for gifts is such a rewarding thing to do.  Most people that haven't tried it yet may feel that it is too complicated or requires too many supplies.  But making jewelry can be as simple as buying a kit  And to help you out you will find discount codes (and links) in the description box below each of these videos on YouTube.


What will I be making next?  I'll give you hint...it won't be jewelry 😊 You'll have to watch my blog to see what's next....OR....better yet, subscribe to my YouTube channel, Janie - The Craft Princess,  and click the little bell next to the SUBSCRIBE button so you don't miss anything!


Thank you all so much for stopping by and....

HAPPY CRAFTING!!!